Friday, July 10, 2015

Speech Bubble Fun


Well, it is about time I publish something. I've been working on a book and devoting my time to far too many volunteer activities and thus neglecting some things--like my blog! I am still sending fun things every other week or so to the grand-kiddos who live out of state but have been remiss in posting them. I used to be committed to posting once a week. My new resolution is once a month. (I may be able to stick to that!)

These "What might they say?" pages are a fun way to add to the conversation.This was an easy one to do because what is needed is so readily available. Everyone gets cards--especially funny ones. Instead of throwing them out after the event, I cut out the characters and then glue them to a white sheet of paper. (Pre-fold the paper if you're going to mail this in a standard envelope.) Adding an empty speech bubble allows for the recipient to suggest what each is saying. You should have heard what some of the kiddos thought these characters said--very funny.

Monday, October 27, 2014

Halloween Crafts

With Halloween just around the corner, I thought it would be fun to post some of the fast, fun and just about free crafts that I've done with, or for, my grand kiddos this year~

Craft 1: Happy Halloween Collage 

All you need for this craft is a piece of paper or cardboard any size you want, scissors, glue and a lot of Halloween newspaper or magazine ads that you would normally throw away. (Packaging tape and index cards and pens are optional.) 

When you have some time or are watching a TV show, you can sit and snip out pictures. Glue them randomly on the paper (or cardboard). You can't make a mistake. If you don't like one thing you glued in place, glue another thing over it. Glue lots of fun stuff all over the paper. To make this collage sturdier, use strips of clear packaging tape taped to the collage face. Lastly, I like to then add an index card that challenges the recipient to find specific items I've glue in place. (I lightly tape the card to the edge of the collage so that it can be easily removed. Since I'm sending these to several children at a time I want the card to be with the collage--at least when it first arrives.) Note: If you're making a collage for a very young child, you may want to outline on the back where the specific "hide and seek" items can be found. These challenges can easily be adapted to fit the age of the recipient. 

I've made these for my grand kiddos and they've made their own and challenged me! They also like to ask me to find additional things in the collages I've made for them. 


Craft 2:  Dryer Sheet Ghostie

While folding laundry recently I began to throw away a spent dryer sheet. I thought, "This would make a good ghost!" 
Cotton ball, yarn, spent dryer sheet
All you need is a spent dryer sheet, a cotton ball and a scrap piece of yarn long enough to tie and hang. (glue, "eyes" and a marker are optional.)
Tie the cotton ball in place

Place the cotton ball "head" in the middle of the dryer sheet and tie in place with the yarn making sure to allow one length of the yarn long enough for your ghostie to hang. Voila! You have a ghost! 

I decided to embellish my ghostie by gluing a few bright hole punch dots in place and then adding some expression with a magic marker dot to the center of each eye. 

Eyes optional 
Florescent green eyes are good.

BOO! 
  
Craft 3: Make Your Own Jack-o-lantern Card

Instead of purchased Halloween cards this year, I found some autumn, plain pumpkin cards in a craft bin and thought they'd be great for making Jack-o-lanterns. This way, I could write a note inside, but each child could design his/her own Jack-o-lantern. I found a sheet of adhesive-backed, black, glitter paper and cut it into several mailable pieces. In each envelope I enclosed a message in the pumpkin and the piece of glitter paper. On the white side of the glitter paper, each child can trace eyes, a nose and a mouth and cut them out. This way, their own pumpkins turn into their own Jack-o-lanterns. Can't wait to see what the kiddos come up with!
Purchased pumpkin--or make your own.

If you need to, simply cut an orange piece of paper in the shape of a pumpkin. I just happened to find these cards and it saved me one step and all four of the kiddos would have the same pumpkin shape with which to start. Loved the fact that yellow envelopes were provided too. Even if all the cards go in one larger envelope to be assured they all arrive on the same day, it is still nice to have a separate envelope for each kiddo to open. 
A personal note goes inside.

Everyone can create his/her own Jack-o-lantern with the adhesive backed glitter  paper. 
 

Friday, October 24, 2014

Critters are Cool

Critters are Cool is my new book of poetry for kids. (But adults will love it too!) It joins the other "Celebrating Poetry that Fits in Your Pocket" books: When Magic Helps Us Steer and Happy Birthday, Florida!

Five-lined Skink
Critters are Cool features all sorts of animals--some unusual and some well-known--presented in poetry form. Kiddos can learn a lot about these special animals while enjoying the word play and black and white illustrations. This book will make it fun to learn about animals and will encourage additional exploration.

From aardvarks and blue-footed boobies to zebroids--there's a lot to learn about in the animal kingdom.

April is National Poetry Month, but poetry is fun all year long. In the back of this book there is a pocket pattern to encourage children to copy and share a poem they love.

Happy reading!

Blue-footed boobies

Tuesday, August 5, 2014

Reusing Seed Catalogs---Making Matches

Time to recycle the old seed catalogs. But before throwing them out, consider turning some of the pictures into a matching game for the kiddos. In these catalogs there will be a lot of similar pictures and each is bright and a good representation of the fruit or veggie. In the first picture, I've simply cut out  two pictures each for each fruit and vegetable used. I glued the pictures in place. Something on the right side matches another picture on the left side. The first line is dotted for the child to trace. Then, the child matches the other pictures in a similar way. (This is a good activity for starting a discussion on good eating habits too.)

Matching Game 1
More. . .
Matching Game 2 (Veggies)

This matching game requires putting a larger picture down one side of the page and then cutting out smaller pictures of the same fruit or veggie. I glued the first pictures in place and then glued the smaller pictures onto sticky tabs. The child can see the picture and read the word. Then, peeling off the backing, the child can match the words with the larger pictures and stick each one in the space provide.
Matching Game 2 (Fruits)

Wednesday, May 28, 2014

Hummingbirds!

The hummingbirds are zipping through the yard and I'm working on my new book, Critters are Cool. Of course, that inspired me and I've put a hummingbird poem in the book too. I sent a video of the birds at the feeders to the kiddos in TX and thought that perhaps they'd like hummers of their own so I immediately had the theme for my letter. I based the bird on bilateral symmetry cutting out several plain white ones at a time. I'm sure they'll make them colorful on their own. The letter suggests that they hold the tails and move the birds up and down quickly in order to have the critters "fly."

I also cut out some small pictures of hummingbirds from the purchased hummingbird feeder food carton. (I purchased it once just to get the container that I could continue to refill with my homemade food.)

The grandkiddos who live locally put out feeders too and now call their big classroom window--bird TV.


Friday, April 11, 2014

Countdown to a Visit

The last time I went to visit the grand-kiddos I estimated the number of days between when they'd get the letter I was sending and my arrival date. Then, I lightly glued little planes (cut from credit card promotional materials) to represent the days. (I made sure to have a few extra planes at the front end so that when the kiddos got the letter they could already remove, or X-out, a few of the planes.)

The children took turns taking off, or X-ing out, a plane. It was like a "count down to Christmas" only this time the countdown was a "count down to Mom-Mom" coming to visit.

The children love getting different and unusual letters each week in the mail.


Tuesday, April 8, 2014

Labeling Fun


Helicopters and Planes to Label
The grandkids in TX love to get letters in the mail. Even with all the electronic connections, the good old-fashion mailbox holds a special place in their hearts. I send a letter each week. Sometimes it's difficult to come up with so many ideas each year, but thus far, I've managed. Some of the ideas overlap. I might send a collage for each season and have the children get out magnifying glasses (I provided inexpensive plastic ones on one trip--anticipation for an upcoming letter) to study the collage and find things, but even those will be of different themes.

Labeling is always fun and I was able to find brochures that had cool pictures of things of interest to the children. The helicopters and biplanes even had the "word cards" easily trimmed from the brochure.

Sunday, February 23, 2014

Bubble Names

Each week I send a letter to TX to keep in "physical contact" with the grandkids who live over 1,000 miles away. FaceTime and Skype are great, but a physical letter still is met with much anticipation. Since the little ones know a letter comes each week, they really do connect with the grandparents who live so far away. I try to make the correspondence into various games and activities that are simple and don't usually require the parent's assistance. It takes a bit of ingenuity to come up with things that fit into a regular sized envelope, are fun and don't require a lot of work on my part or on the part of the kiddos. Sending the little ones their names as bubble letters was a big hit. It didn't matter that the younger ones only scribbled on their name cards-and that the baby tried to eat hers-the idea was that each child received a written gift in the mail from many miles away--and it was something they could decorate. I drew a few items around each name--things that are of interest to that particular kiddo. Of course, instead of drawings, it would be fun to add stickers to the envelope to aid in personalizing. Either way, this was a big hit and something I'll use again in a slightly different form.

Friday, January 24, 2014

Clean-Up Fun

Empty box-scissors, tape
(Markers, stickers, etc. as desired)
If you want your little ones to think that clean up is fun, all you have to do is turn an empty tissue box into a loud-mouthed monster who likes to eat trash! They will be eager to "feed the monster!"

Simply flatten the box by carefully tearing it open where it is glued. It is easier to decorate a flat surface. Also, this shows how it can be stored and stacked with your construction paper to be used again later.


You can make your monster any way you like, but I think it is especially cute to give a monster some funny hair that sticks straight up. I simply cut strips down on the flap that is above the "face" portion of the box. This can be curled, colored, beribboned, etc. to make your monster unique. If you are using a large, rectangular box without this "hair flap," you may want to add yarn hair, an antenna, a hat or something you think is funny. ANY tissue box will work with a little adaptation as long as the opening is the mouth.


Cut down on one flap to make "hair."
Add some facial features to you trash monster. 
I like to add funny eyes.  Plastic google-like eyes can be added, but a simple sticker-magic marker drawn eye will suffice. Let children be creative in making their monsters--the trash eating monster can be an arts and crafts activity in and of itself--and it's reusable.


Reshape the box and tape the side (which is now the bottom) so that it stays closed and sits on the craft area to "gobble up the trash" from an arts/crafts activity. Children love to take their monster to the trash can and empty out his mouth (or shake trash out of is head!). This activity makes clean up a fun activity.

Once the trash is emptied into the real trash can, the tape can be removed and the monster can be folded flat to be stored with other craft items. It can be used again and again.
Once the monster is done, it will be fun to feed it trash! 

Monday, January 13, 2014

Swords and Shields

      It was wonderful having the entire family here for Christmas. Once Christmas was over and all the decorations were put away, it was time for me to get "back in the groove" and start sending my weekly fun letters to the "long-distance" grands who had returned to Texas. I knew they'd enjoy this activity.
      When everyone was here we had a lot of vegetables and that meant opening some canned good. Since I buy a lot of groceries in bulk, the cans come in 6 or 8-pks and there is a nice curved-rectangular piece of cardboard at the bottom holding the cans. I put a stack of the cardboards aside just for this activity.

Cardboard from canned good.
For the sword, fold a piece of paper (approximately as long and wide as the cardboard) and cut out one-half of a sword shape, open the shape and trace the entire outline onto one of the cardboard pieces. Cut the sword out with a craft knife or scissors. (An adult should do the cutting.)
Make one-half the shape.

Trace the sword shape onto one cardboard.

Make one for everybody! 

Mark and cut two "straps" on the second cardboard.
Make a shield with a second cardboard. A child's small arm will easily slip into the two  "straps" so the child can hold the sword in one hand and the shield in the other.
I like to put the child's name or initial on the shield. They like to color and decorate the sword and shield.
Remind the little ones that these are for playing and dress-up and not for being too rough!

Thursday, November 14, 2013

Rudolph, the Red Nosed Reindeer

Palm "boot" piece, bow, eyes.
 When we lived in the panhandle of Florida, a parent of one of my kindergarteners presented me with the cutest "Rudolph" for a Christmas present. He had taken a "boot" from a palm tree, cleaned it, applied a clear varnish and added a bow and eyes--and of course, a cute nose.  When I went to hang "Rudolph" last year I realized the original bow, eyes and nose no longer looked very good. Still,  the tree piece was in great shape.  I removed the yellowing eyes, the crumpled and faded bow and the sad looking nose.
Hot glue bow, eyes and a nose.
The new, crisp bow just below the "antlers" part of the palm piece is now bright red (and made from outdoor, colorfast ribbon).The eyes are large, shiny "google" eyes and the new nose is a bright red. The transformation simply took some fresh ribbon, craft "google"eyes and a puffy craft ball and some hot glue to keep it all in place.

The old Rudolph is recycle, refurbished and renewed and . . . the handsome new Rudolph is ready to hang on a wreath on our front door.

Rudolph, the Red Nosed Reindeer

Thursday, September 19, 2013

Tag-It People! 

Bread, fruit, or veggie bag closure tags have an interesting flat shape. They are easy to come by and make cute little "Tag-it People." The best part is--they're free! Collect some tags and get some fine-tipped permanent markers. The tag points can be used as the "legs" of the Tag-it. Or, turn it upside-down and make the tag points look like pulled up pigtails. Look at some of the examples on the green board below and come up with some interesting Tag-its of your own. Tag-its are cute and positive little people you can use to "tag" someone and show them you care. Because of their shape, Tag-its will hook onto the bottom of a T-shirt, a belt loop or edge of a garment.
1. Most tags are plain. This one had a
paper attachment so I used it. 

2. Color both sides of the paper .

3. Cut the strip from edge to tag.

4. Add details to the tag to make a Tag-it Person.

5. Curl the strips to make "hair."

6. Just a few of my collection of Tag-its along with plain ones ready to be inked. 
Tag-its are not intended for small children. Keep small items like this away from children under 3 yrs. of age. 

If you create an especially cute Tag-it, please send it to my blog so that I can post it. 

Thursday, July 4, 2013

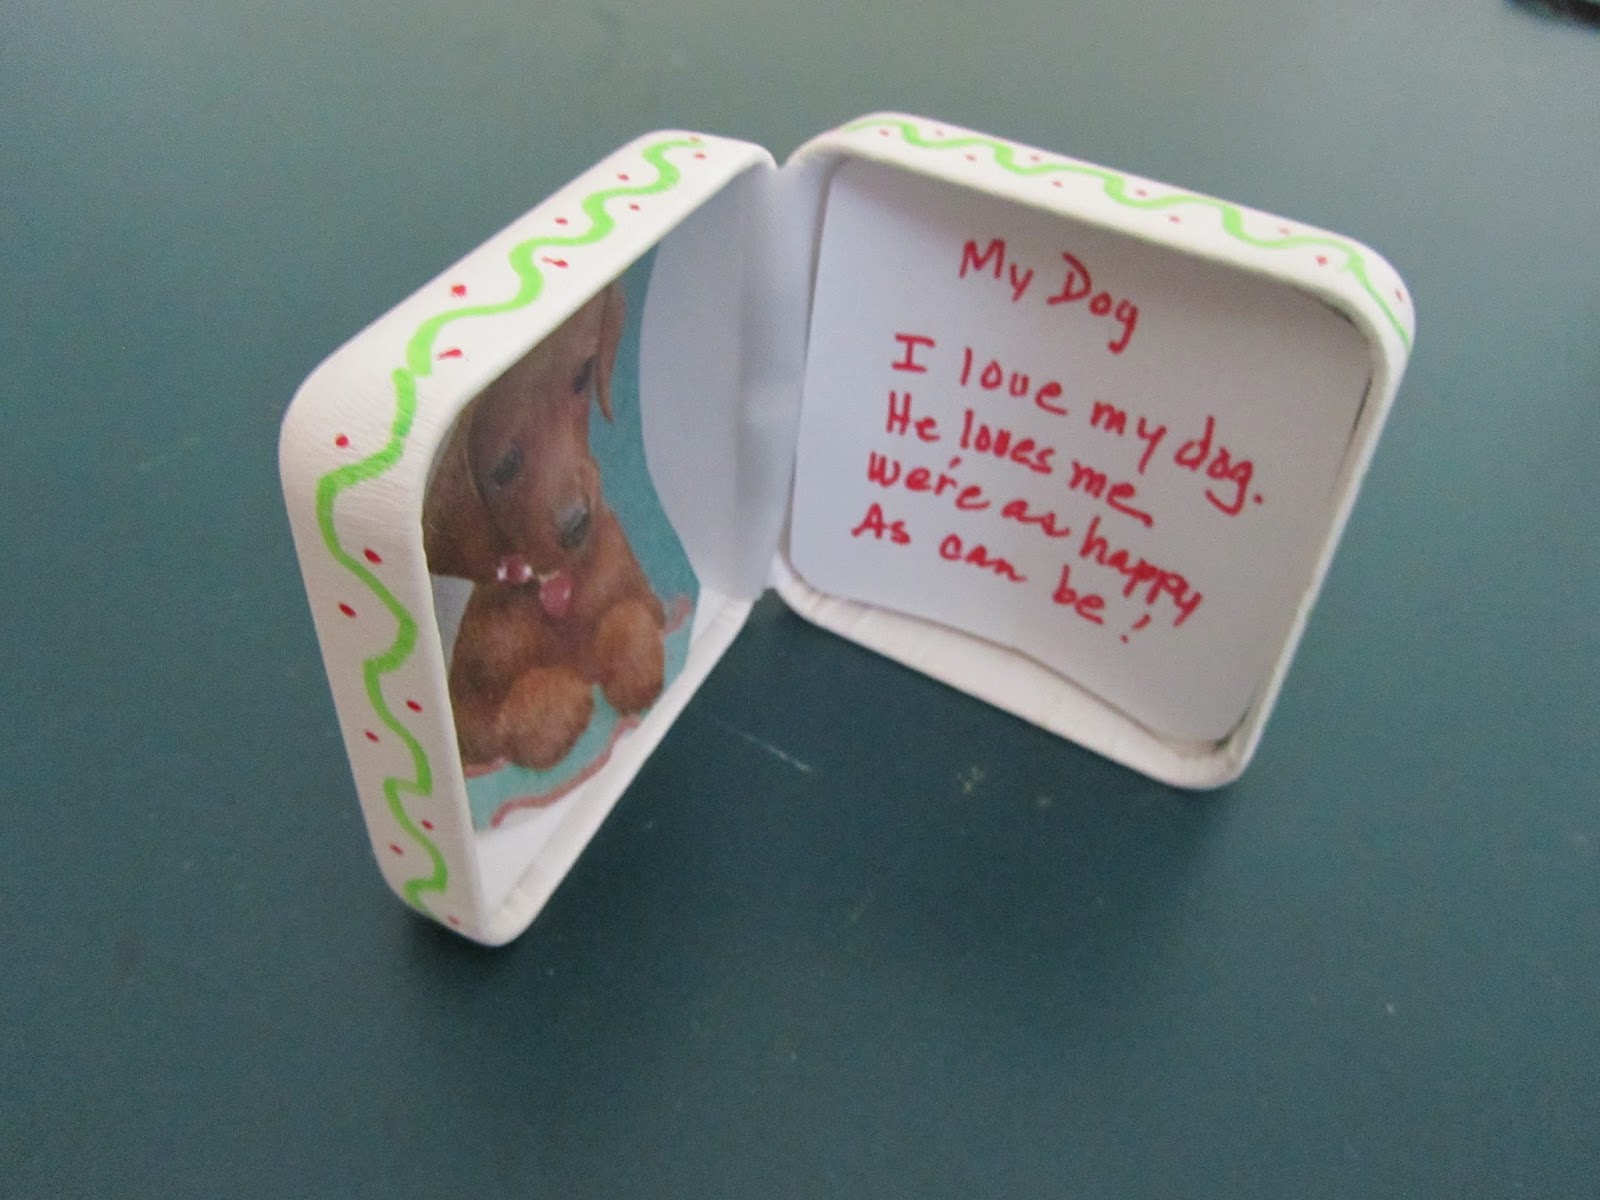
Mini Picture Frames

Recently I received a piece of jewelry and hated to think of throwing away the cute little hinged box it came in. (Okay, I have "recycling" in my blood. It must be part of my DNA. I don't like to throw things away--especially if I can find another way to repurpose them.)

Anyway, I turned the hinged box over in my hand a few times and then realized that when it sat sideways it looked like a little picture frame. I removed the inside silky lining and cut a picture to fit in one side and made up a little verse for the other side. Of course, two pictures inside would have been nice too. Once the box is turned over on its side, it sits nicely on a flat surface. Kiddos will especially like that the box can close on its hinge and hide the picture(s) inside. That makes for even more fun. Decorate the outside with markers, or glue on plastic "gems" or foamy pieces to make the picture frame unique.

Wednesday, May 1, 2013

Time Capsule News


There are a lot of fun and historical things happening around the state of Florida in celebration of our 500 Birthday. 

My book, Happy Birthday, Florida! (1513-2013) was honored recently with inclusion in the time capsule event at the Seminole County Public Library System, East Branch. I was able to read a poem, "Florida's Name" from the book.  Now, if I can just live long enough to be at the "unearthing" in 50 years! 


Friday, February 15, 2013

Newest Book

It's here! I finished Happy Birthday, Florida! in time to have it available for the many festivities happening in and around the state as it celebrates its 500 "birthday."

When Ponce de Leon arrived and called the lovely land "La Florida" he was referring, no doubt, to the budding spring that surrounded him and his crew.

As the ending of "Florida's Name" states:

It's good he came in springtime
And not during torrential rain,
Or else our lovely Florida
Might have been named--
    "La Hurricane."

This book is loaded with zany and thought-provoking poems intended for the 3rd gr. to middle-school audience. But, as always, adults tell me they love the poems as much as the kids.
Happy Birthday, Florida!
1513-2013

Monday, October 22, 2012

Christmas Trees (Dynamic Dioramas)


 Once the holidays are here--they're here! Time to think about Christmas too. My last post talked about Halloween trees from tomato stems. Why not consider a Christmas tree from grape stems! One of the fun things is you get to eat some yummy grapes before you do this craft. (In fact, the eating needs to be done a few days earlier.) This craft is a great way to show kids how things dehydrate. Enjoy some grapes with your kids, save the stems, and put them on the window sill to dry out. Let the kids check out the dehydration process each day to see how the moisture leaves the stem. When the stem is dry, take it outside and spray paint it white, silver, gold, etc. (Remember, the adult needs to do the spraying.) Once the paint is dry, cover your work area with newspaper. Hold the bottom of the stem and apply small amounts of non-toxic white glue with a paint brush to the areas you want sparkly. Before the glue dries, place the stem in a clear baggie, and shake glitter onto the stem. Or hold the stem, close the baggie with the stem in the "zipper" and softly shake the glitter onto the glued areas. Prepare a small white paper plate with a clump of pliable, inexpensive clay. (I like to also add a little spray painting to the plate ahead of time.) Push the bottom of the stem into the clay and tighten the clay around it. Hide the clay by applying pulled cotton balls to the base of the tree. (Sprinkle a little glitter on the cotton balls too, if desired.) Maybe you'd also like to add sticker stars or something to the tree. Make it fun! Make it your own.

Enjoy some grapes. Let the stems dry out.
This is how to hold the stem in the baggie.
This idea was in my book Little Hands-Create!

The finished product! 

Halloween Spooky Trees (Dynamic Dioramas)


Halloween is almost here. If, like me, you've been nibbling on the fine harvest of small, on-the-vine tomatoes available this time of year you also have been taking them off the vine and noticing what intricate stems they have. Not only are the tomatoes delicious, but the stems, when left to dry and get gnarly, make for great miniature diorama-type trees.

Simply allow the stem to dry on a window sill for a few days. Once it seems dry and looks kind of gnarled, paint the stem black (preferably outdoors) using your favorite brand of spray paint. (Note: Spray painting is an adult activity. Children should not use spray paint.) Hang a bat or sit a black cat or witch on a branch. (I used the bat from the Snipper Critters book I mentioned in my last post, but any free, hand-cut bat or animal cut from construction paper would do.) Push the stem bottom into a wad of clay that you've placed in the center of a small paper plate. Then, cut a black piece of construction paper to fit over the clay leaving a hole big enough to go around the stem piece. Decorate around it any way you choose. 
Use it in a Halloween centerpiece or diorama.

Sunday, October 21, 2012

Florida Reading Association News

I just returned from doing a workshop session at FRA. Yes, it went well and the attendees were great, but as always, I failed to get in everything I wanted to in the hour allotted. There are so many ideas to share! My worst "no-no" was failing to send around an 'email gathering list' so I could alert the attendees to when, Happy Birthday, Florida! Celebrating Poetry that Fits in Your Pocket, my new book of poetry, comes out next month. I had a list made up and attached the proposed cover, but somehow it stayed near my podium until someone-after the workshop-asked me to email her when the book came out. I think an hour workshop just doesn't work for me. I need more time to "get it all in."
Still, all in all, my session went well. Meeting the new young teachers and "soon-to-be" teachers is always one of the most rewarding experiences of these FRA events. Stephanie, Tara, Jessica, Jennifer, Hangie, and so many others made me smile and know that the education of the next generation is in good hands. Thank you teachers!

The general craft.
 I try to do "open-ended" crafts at the workshops. I present an idea and a craft adaptable to many uses. This way, no matter if a teacher has K, middle-school/HS or any grade in between, there will be a way to use the craft for their specific need. One craft we did represented a kind of "Webbing" where students
Book of 80+ animals, 40+ activities
and teacher "help section 
are able to visualize connections. This craft is accomplished by having one paper plate in the center and four (or more or less) connected to the center plate with yarn. The center plate becomes the "main idea" or the "topic" and the outer plates break the main idea or topic down into smaller pieces. In the example I give, I have the workshop participants cut out a critter from my Snipper Critters book (Maupin House Publishing). Then, we place the critter on the center plate. The outer plates hold the content the students discover about the critter. In this case, I chose kinds of, traits, habitat, and future, but a teacher might want to add more plates or connect even smaller plates to one, or more, of the secondary plates.

A teacher may wish to not use a critter and instead put, KINDS OF SENTENCES on the middle plate and then declarative, interrogative, imperative and exclamatory on the secondary plates. Or, ANGLES on the middle plate and examples of angles on the secondary plates. HS and middle-school students, just like younger students,  benefit from unusual visuals that stay up in a classroom and reinforce what is being taught.

Open-ended is just that. YOU use it how you want to use it.